
Background
Janus is a 7 billion parameter multimodal model from DeepSeek AI that can perform both text-to-image generation and image understanding tasks. While it’s smaller than models like DALL-E 3 or Midjourney, it can run locally on consumer hardware.
Setup Requirements
- Python 3.8 or higher
- An Apple Silicon Mac (tested on M3)
- About 18GB of available RAM
- The following Python packages:
pip install torch transformers pillow numpy tqdm
pip install git+https://github.com/deepseek-ai/Janus.git
The Code
Here’s the complete working implementation that generates 384×384 images:
import os
import PIL.Image
import torch
import numpy as np
from transformers import AutoModelForCausalLM
from janus.models import MultiModalityCausalLM, VLChatProcessor
from tqdm import tqdm

# Check if MPS is available
device = torch.device("mps" if torch.backends.mps.is_available() else "cpu")
print(f"Using device: {device}")

# specify the path to the model
model_path = "deepseek-ai/Janus-Pro-7B"
print("Loading processor and tokenizer...")
vl_chat_processor = VLChatProcessor.from_pretrained(model_path)
tokenizer = vl_chat_processor.tokenizer

# Load the model
print("Loading model...")
vl_gpt = AutoModelForCausalLM.from_pretrained(
    model_path,
    trust_remote_code=True
)
vl_gpt = vl_gpt.to(torch.bfloat16).to(device).eval()  # bfloat16 for memory efficiency
print("Model loaded and ready!")

# Set up the conversation
conversation = [
    {
        "role": "<|User|>",
        "content": "A serene mountain landscape with a lake at sunset", # change this for your text prompt
    },
    {"role": "<|Assistant|>", "content": ""},
]

# Prepare the prompt
print("Preparing prompt...")
sft_format = vl_chat_processor.apply_sft_template_for_multi_turn_prompts(
    conversations=conversation,
    sft_format=vl_chat_processor.sft_format,
    system_prompt="",
)
prompt = sft_format + vl_chat_processor.image_start_tag

@torch.inference_mode()
def generate(
    mmgpt: MultiModalityCausalLM,
    vl_chat_processor: VLChatProcessor,
    prompt: str,
    temperature: float = 0.8,
    parallel_size: int = 1,
    cfg_weight: float = 5,
    image_token_num_per_image: int = 576,
    img_size: int = 384,
    patch_size: int = 16,
):
    print("Initializing generation process...")
    input_ids = vl_chat_processor.tokenizer.encode(prompt)
    input_ids = torch.LongTensor(input_ids).to(device)

    print("Setting up token generation...")
    tokens = torch.zeros((parallel_size*2, len(input_ids)), dtype=torch.int).to(device)
    for i in range(parallel_size*2):
        tokens[i, :] = input_ids
        if i % 2 != 0:
            tokens[i, 1:-1] = vl_chat_processor.pad_id

    inputs_embeds = mmgpt.language_model.get_input_embeddings()(tokens)
    generated_tokens = torch.zeros((parallel_size, image_token_num_per_image), dtype=torch.int).to(device)

    print("Beginning token generation...")
    for i in tqdm(range(image_token_num_per_image), desc="Generating image tokens"):
        outputs = mmgpt.language_model.model(
            inputs_embeds=inputs_embeds,
            use_cache=True,
            past_key_values=outputs.past_key_values if i != 0 else None
        )
        hidden_states = outputs.last_hidden_state

        logits = mmgpt.gen_head(hidden_states[:, -1, :])
        logit_cond = logits[0::2, :]
        logit_uncond = logits[1::2, :]

        logits = logit_uncond + cfg_weight * (logit_cond-logit_uncond)
        probs = torch.softmax(logits / temperature, dim=-1)

        next_token = torch.multinomial(probs, num_samples=1)
        generated_tokens[:, i] = next_token.squeeze(dim=-1)

        next_token = torch.cat([next_token.unsqueeze(dim=1), next_token.unsqueeze(dim=1)], dim=1).view(-1)
        img_embeds = mmgpt.prepare_gen_img_embeds(next_token)
        inputs_embeds = img_embeds.unsqueeze(dim=1)

    print("Decoding generated tokens into image...")
    dec = mmgpt.gen_vision_model.decode_code(
        generated_tokens.to(dtype=torch.int),
        shape=[parallel_size, 8, img_size//patch_size, img_size//patch_size]
    )
    dec = dec.to(torch.float32).cpu().numpy().transpose(0, 2, 3, 1)
    dec = np.clip((dec + 1) / 2 * 255, 0, 255)

    visual_img = np.zeros((parallel_size, img_size, img_size, 3), dtype=np.uint8)
    visual_img[:, :, :] = dec

    print("Saving generated image...")
    os.makedirs('generated_samples', exist_ok=True)
    for i in range(parallel_size):
        save_path = os.path.join('generated_samples', f"img_{i}.jpg")
        PIL.Image.fromarray(visual_img[i]).save(save_path)

    print("Generation complete! Check the 'generated_samples' directory for your image.")

# Generate images
print("Starting the generation process...")
generate(vl_gpt, vl_chat_processor, prompt)
Key Optimizations
To get this running efficiently on Apple Silicon, we made several important optimizations:
- Used MPS (Metal Performance Shaders) for hardware acceleration
- Employed bfloat16 precision instead of float16 to avoid type mismatches
- Set parallel_size to 1 to generate one image at a time
- Used a moderate temperature of 0.8 for stable generation
- Added progress tracking for visibility into the generation process
Performance
On an M3 Mac with 18GB RAM, generation takes approximately 3 minutes and 33 seconds for a 384×384 image. Memory usage stays around 17-18GB during generation.
Results
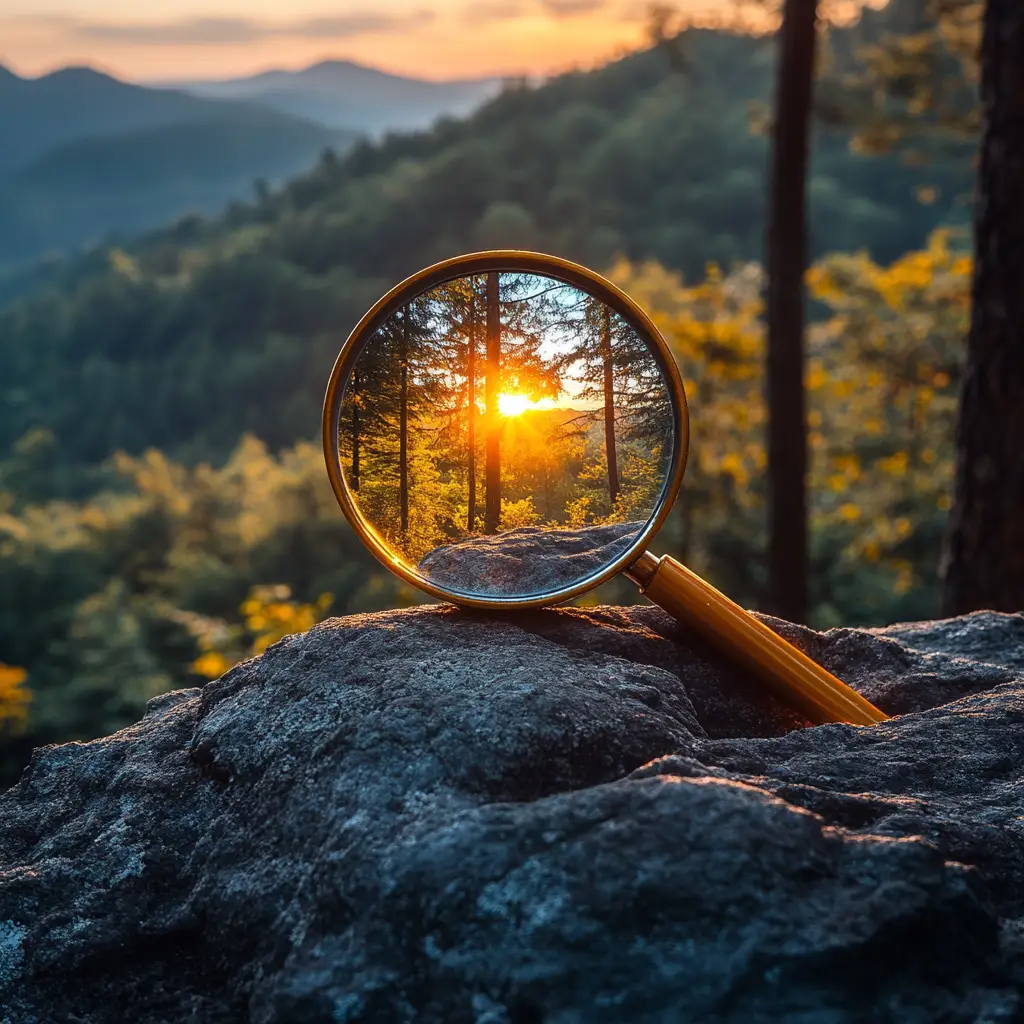
The model produces impressive results, with particularly good handling of natural landscapes, lighting effects, and atmospheric perspective. The example prompt “A serene mountain landscape with a lake at sunset” generated a photorealistic image with well-rendered sunset lighting, mountain reflections, and environmental details. Is it perfect? No. But it’s impressive it’s running on a laptop as quickly as it is!

Limitations and Considerations
- The model requires significant RAM (around 18GB)
- Generation times are longer compared to GPU-accelerated solutions
- Image size is currently limited by memory constraints
- The model works best with descriptive, detailed prompts
While not as fast as running on a dedicated GPU, this implementation shows that it’s possible to run sophisticated text-to-image models locally on Apple Silicon with reasonable performance. This opens up possibilities for developers and researchers who want to experiment with text-to-image generation without relying on cloud services or expensive GPU hardware.
Technical Note: Understanding Janus-Pro’s Image Size Constraints
When implementing Janus-Pro for text-to-image generation, it’s crucial to understand that the 384×384 pixel output size isn’t arbitrary or merely recommended – it’s fundamentally tied to the model’s architecture.
Architectural Design
Janus-Pro is built on two key components:
- SigLIP-L vision encoder for multimodal understanding
- A specialized tokenizer with a fixed downsample rate of 16
The SigLIP-L component is specifically designed to work with 384×384 pixel images. Meanwhile, the downsample rate of 16 means the model processes images in 24×24 patches (since 384/16 = 24). These constraints are deeply embedded in both the understanding and generation components of the model.
Why This Matters
Attempts to modify the output resolution (like scaling to 512px or 1024px) will fail because they conflict with these architectural constraints. The model expects:
- Input/output size: 384×384 pixels
- Patch size: 16×16 pixels
- Resulting grid: 24×24 patches
This explains why our implementation works reliably at 384px but encounters errors when attempting other resolutions. Any changes to these dimensions would require fundamental modifications to the model’s architecture.
Implementation Implications
When working with Janus-Pro, it’s best to design your applications around these fixed constraints rather than trying to modify them. The 384×384 resolution, while perhaps smaller than some other image generation models, is a deliberate choice that balances quality with computational efficiency. It doesn’t make it very useful in day to day operations, but it still impressed me with the ability to generate images so quickly on relatively cheap hardware.